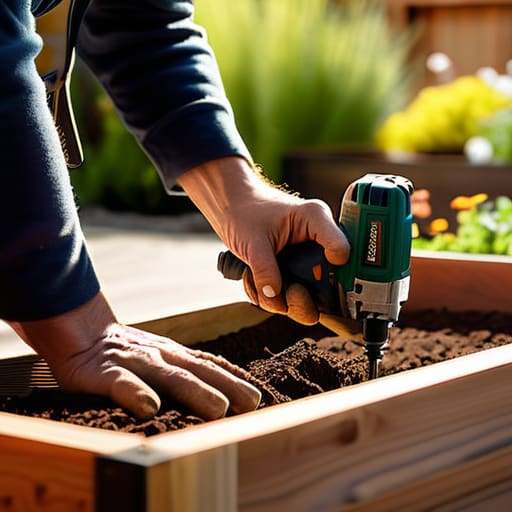
Have you ever felt like your backyard was just a collection of disconnected patches of grass rather than a cohesive sanctuary? I used to stare at my empty patio, feeling that itch to create something meaningful, but the thought of building a raised garden bed from wood felt so daunting and clinical—like I was just following a dry, dusty blueprint from a hardware store manual. I remember sitting on the dirt, surrounded by scraps of cedar, feeling more like a confused laborer than an artist. But then it clicked: a garden bed shouldn’t just be a container for dirt; it should be a living, breathing sculpture that anchors your entire outdoor aesthetic.
In this guide, I’m stripping away the intimidation and the unnecessary jargon to show you how to craft something truly soulful. We aren’t just assembling planks; we are creating a stage for your botanical dreams to perform. I’ll walk you through the honest, practical steps of building a raised garden bed from wood with a focus on durability and character, ensuring your new garden sanctuary feels like a natural extension of your home’s unique spirit. Let’s get our hands a little dirty and bring some magic to your soil.
Guide Overview
Tools & Supplies
- Drill/Driver for assembling the frame
- Measuring Tape for accurate cuts
- Level to ensure even ground
- Saw for trimming wood if needed
- Untreated Cedar or Redwood boards (4-6 pieces)
- Wood Screws (1 box, exterior grade)
- Corner Posts (2×2 lumber, 2-4 pieces)
- Garden Soil (enough to fill volume)
Step-by-Step Instructions
- 1. First, we need to gather our ingredients for this little transformation. Head to your local lumber yard and look for untreated cedar or redwood—these woods are nature’s own protectors against rot, ensuring your sanctuary lasts through many seasons. Grab some heavy-duty exterior screws, a drill, a level, and perhaps a measuring tape that’s seen a few adventures. I like to think of this stage as gathering the raw elements before the alchemy of creation begins.
- 2. Once you have your timber, it’s time to map out the dimensions of your new sanctuary. I usually find that a height of about 12 to 18 inches is just right—enough to give your plants deep roots to dream in, without feeling like a fortress. Measure twice, cut once, and as you work, imagine how the sunlight will dance across the grain. This isn’t just construction; it’s about sculpting a space for life to flourish.
- 3. Now, let’s start assembling the frame. Lay your boards on a flat surface and align them to form your rectangle. As you drive the screws in, I like to imagine I’m giving this structure its first heartbeat. If you’re feeling particularly whimsical, you might name this specific bed—I once built a small one I called “The Verdant Whisper.” Make sure every corner is tight and true, because a sturdy foundation is the secret to a soulful garden.
- 4. To keep your wooden masterpiece from shifting over time, I highly recommend installing some corner posts. These are sturdy 4×4 blocks that sit inside the corners, acting like the strong, silent guardians of your garden’s structure. Screw your sideboards directly into these posts; it adds an extra layer of architectural integrity that keeps the whole piece feeling grounded and intentional.
- 5. Before we fill it with life, we must prepare the ground. Clear away any unruly weeds or debris from the site to ensure your bed is sitting on a clean slate. I often line the bottom with a layer of untreated cardboard—it’s a wonderful way to suppress unwanted invaders while naturally decomposing into something beautiful for the soil below. It’s that little touch of circular magic that makes a garden feel truly alive.
- 6. Now comes the most rewarding part: the soul-filling. Mix a rich, dark compost with high-quality topsoil to create a medium that is nothing short of pure botanical velvet. As you pour the soil into your new wooden sanctuary, take a moment to appreciate the texture and the scent of the earth. You aren’t just filling a box; you are preparing a cradle for the vibrant colors and scents that will soon define your outdoor oasis.
Choosing Your Canvas Cedar vs Pressure Treated Lumber for Gardening
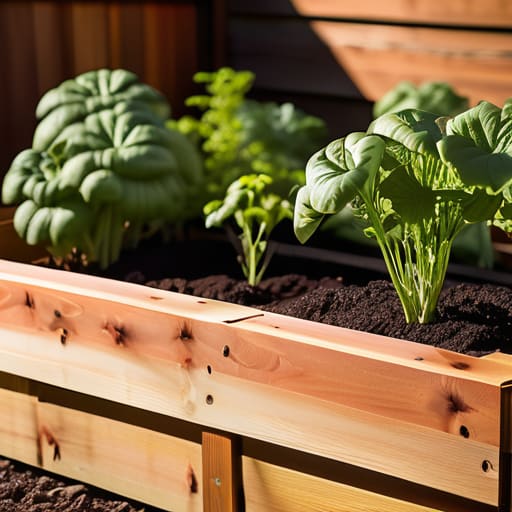
When you’re standing in the lumber aisle, it can feel a bit like staring at a blank canvas without knowing which brush to pick up. This is where the debate of cedar vs pressure treated lumber for gardening really comes into play. Personally, I have a soft spot for cedar; its natural oils act like a built-in shield, making it one of the best woods for raised garden beds if you want something that ages gracefully alongside your plants. There’s something so poetic about the silvery patina cedar develops over time—it feels like a gentle nod to the passage of seasons.
Now, if you’re working with a tighter budget, pressure-treated lumber is a sturdy, reliable alternative. While some worry about chemicals, modern treatments are much safer than the old ways, though I always suggest lining your bed to add an extra layer of protection. Regardless of your choice, keep an eye on your dimensions for raised vegetable beds to ensure you aren’t stretching your reach too far. Choosing your material is the first step in ensuring your new sanctuary remains a vibrant, enduring haven for years to come.
Perfecting the Proportions Dimensions for Raised Vegetable Beds
Now, before we start gathering our garden bed assembly tools, let’s talk about the geometry of your future sanctuary. It is so tempting to just build something massive, but I’ve learned that function must dance with accessibility. When deciding on the dimensions for raised vegetable beds, I always recommend keeping the width to no more than four feet. This ensures you can reach the very center of your miniature jungle without stepping onto the soil and compacting it—we want our plants to have room to breathe, not be crushed by heavy footsteps!
As for the depth, think about what kind of magic you want to grow. If you’re dreaming of deep-rooted carrots or radishes, aim for at least twelve inches of depth. If you’re just looking to host a whimsical collection of herbs and lettuces, a shallower bed might suffice. I like to think of these dimensions as the architectural blueprint for your backyard dreams. By getting the proportions just right now, you’re setting the stage for a lush, thriving ecosystem that feels intentional and perfectly balanced within your creative landscape.
Little Secrets for a Flourishing Sanctuary: My Top 5 Tips for Garden Bed Success
- Mind the Drainage: Just as I ensure my miniature terrariums have the perfect pebble layer to prevent soggy roots, your garden beds need a way to breathe. Avoid placing them on heavy, compacted clay without a little help; instead, consider a layer of coarse gravel or even some old, broken terracotta shards at the base to keep the water dancing rather than drowning your precious greens.
- Give Your Garden a Soul: Don’t just treat this as a construction project; treat it as an introduction to a new character. I like to think of my beds as living sculptures. Consider adding a touch of whimsy—perhaps a hand-painted ceramic marker or a small, solar-powered fairy light tucked into the corner—to transform a simple wooden box into a magical corner of your realm.
- The Layered Magic of Hugelkultur: Instead of filling your entire bed with expensive, store-bought soil, why not play with layers? I love using the “hugelkultur” method—tucking old logs, fallen branches, and dried leaves at the very bottom. As they slowly decay, they create a nutrient-rich, moisture-retaining foundation that acts like a slow-release battery of life for your plants.
- Protect Your Investment: Since we’re working with wood, we want these sanctuaries to age gracefully, much like a well-loved antique. To extend the life of your bed without using harsh chemicals, consider lining the interior walls with a food-safe, BPA-free pond liner. It keeps the damp soil from constantly pressing against the wood, preventing rot while keeping your organic garden truly pure.
- Plan for the Future Flow: When you’re assembling your pieces, remember that a garden is a living, breathing entity that grows and changes. Leave enough space between your beds to wander comfortably—think of it as creating “pathways of inspiration.” You want to be able to kneel down, get your hands in the dirt, and whisper secrets to your herbs without feeling cramped by your own design.
Cultivating Your Living Masterpiece
As we bring this project to a close, take a moment to look at the wooden sanctuary you’ve just constructed. From the pivotal decision of selecting between the timeless durability of cedar or the practicality of treated lumber, to the intentionality of finding those perfect, ergonomic dimensions, you have done more than just follow a set of instructions. You have laid the foundational bones for a new ecosystem within your home. By carefully considering the material and the scale, you’ve ensured that this isn’t just a box of wood, but a purpose-built vessel designed to nurture life and sustain the vibrant energy your garden deserves.
Now comes the most enchanting part: the transformation. As you fill this frame with rich, dark soil and tuck your first seedlings into their new home, remember that you aren’t just gardening; you are curating a living legacy. I often think of my own terrariums when I look at these beds—they are tiny, breathing worlds that demand our wonder. Let this raised bed be a place where your creativity can bloom alongside your basil and marigolds. May it become a corner of your world that sparks constant joy, reminding you that with a little bit of soul and a touch of bohemian magic, even the simplest wood can become a portal to nature’s wonders.
Once you’ve mastered the geometry of your garden sanctuary, I always find that the true magic happens when you start thinking about the rhythm of your lifestyle and how your outdoor space interacts with your social world. Whether you’re planning a quiet, meditative morning with your coffee or looking to host a lively, spontaneous gathering under the stars, your garden should be an extension of your most authentic self. If you find yourself craving more connection and vibrant energy in your local community to complement your new creative haven, exploring adelaide casual encounters can be a wonderful way to find that spark of human connection that makes a house truly feel like a home.