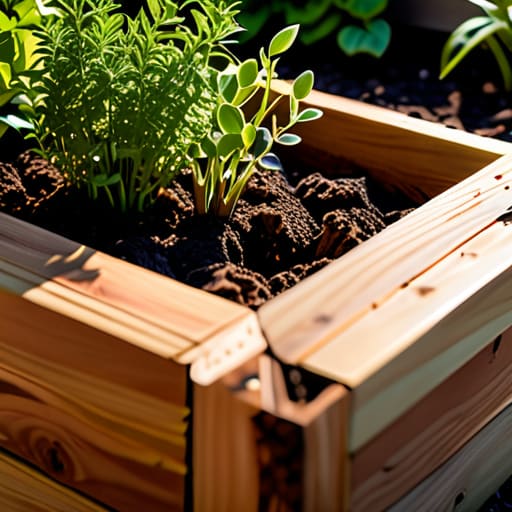
I was standing in my backyard last Tuesday, surrounded by a chaotic sea of sawdust and half-cut planks, staring at what I’d affectionately named “The Verdant Vessel”—my latest project. Most people will tell you that building a raised garden bed from wood is just a tedious weekend chore involving a hardware store run and a pile of lumber, but they’re missing the magic entirely. To me, it isn’t about checking a box on a DIY list; it’s about sculpting a sanctuary where your botanical dreams can actually take root and thrive. When you approach a project with intention, you aren’t just constructing a box; you are creating a living stage for nature to perform.
In this guide, I’m stripping away the overwhelming jargon and the overly complicated blueprints that make most tutorials feel so clinical. I’m going to walk you through the soulful process of selecting the right timber and assembling your own masterpiece with honest, no-nonsense techniques. We’ll focus on creating something that feels less like a garden utility and more like a seamless extension of your home’s personality. Let’s roll up our sleeves and turn that patch of dirt into something truly extraordinary.
Guide Overview
Tools & Supplies
- Drill/Driver for assembling wood
- Measuring Tape for accurate cuts
- Level to ensure flat base
- Saw for sizing lumber (if not pre-cut)
- Untreated Cedar or Redwood planks (4-6 pieces)
- Wood Screws (1 box, exterior grade)
- Corner Posts (4 pieces, 2×2 or 4×4)
- Garden Soil (enough to fill volume)
Step-by-Step Instructions
- 1. First, we need to gather our soul-nourishing materials. I always say that a project is only as good as the energy you put into the selection process, so skip the chemically treated lumber that feels soulless and instead hunt for reclaimed cedar or redwood. These woods are nature’s own champions, naturally resistant to rot and decay, ensuring your garden vessel lives a long, beautiful life. Grab a handful of stainless steel screws—they won’t rust away like old memories—and a sturdy drill to bring it all together.
- 2. Once you have your timber, it’s time to map out the dimensions of your new sanctuary. I like to think of this as sketching the skeleton of a dream, so decide whether you want a sprawling, low-profile bed or something more architectural and upright. Use a carpenter’s square to ensure your corners are perfectly crisp, because even in a bohemian space, there is a profound beauty in clean, intentional lines that ground the wildness of the plants.
- 3. Now, let’s begin the assembly by laying out your side planks. I prefer to start by creating a sturdy frame, pre-drilling small pilot holes to prevent the wood from splitting—think of it as giving the timber a gentle welcome before the screws arrive. Fasten your corner posts first, as these act as the anchors for your entire creation, holding the structure steady against the inevitable embrace of growing roots.
- 4. As the walls begin to rise, take a moment to check the level of your ground. If your backyard has a bit of a whimsical, uneven slope, don’t panic; just dig out small pockets of earth beneath the corners until your bed sits stately and true. A garden bed that leans too far might look like it’s trying to dance, but for the sake of your soil and your sanity, we want a foundation that feels rock-solid.
- 5. Before we add the magic of the soil, I highly recommend lining the bottom with a layer of untreated cardboard or a heavy-duty landscape fabric. This acts as a protective veil, suppressing unruly weeds while allowing the earthworms to perform their silent, essential alchemy beneath the surface. It’s a small, thoughtful detail that honors the cycle of life happening just beneath your fingertips.
- 6. Finally, it’s time to fill your creation with life. Instead of just grabbing any old bag of dirt, I love to layer my beds like a miniature terrarium—starting with a base of coarse twigs and organic matter, followed by rich compost, and topped with a velvety layer of nutrient-dense soil. Once it’s filled, give it a gentle watering to settle the earth, and just like that, you’ve transitioned from a mere builder to a true curator of living art.
Choosing Your Canvas Cedar vs Pressure Treated Lumber for Gardening
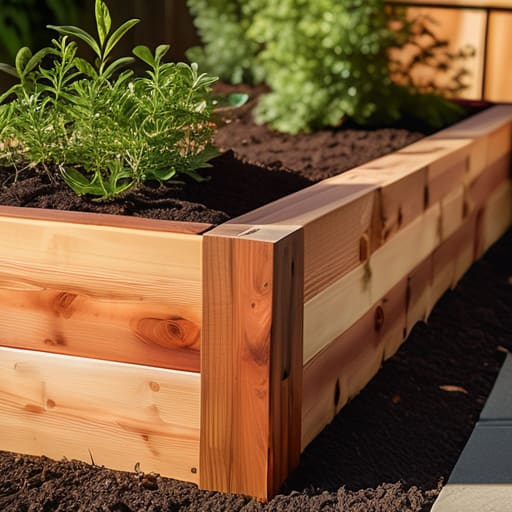
Before we pick up our hammers, we need to decide what kind of soul we’re giving our new garden sanctuary. When debating cedar vs pressure treated lumber for gardening, I always find myself leaning toward the romantic, silvery hues of cedar. It’s a natural superstar—naturally resistant to decay and insects without needing any heavy-duty chemical interventions. It feels more in tune with the organic rhythm of a garden, though I’ll admit, it does come with a slightly higher price tag for that premium, earthy elegance.
On the other hand, if you’re working with a tighter budget, pressure-treated wood is a sturdy, reliable contender. While modern treatments are much safer than the old-school versions, some of my fellow plant lovers still prefer to avoid them when growing edible herbs or veggies. If you do go this route, I suggest lining the interior with a food-safe barrier to keep things pristine. Ultimately, selecting the best wood for raised garden beds is about balancing your creative vision with the longevity you want for your little slice of paradise. Whether you choose the rustic charm of cedar or the practical strength of treated pine, make sure it feels right for the story you’re telling.
Curating Your Toolkit an Essential Garden Bed Construction Tools List
Before we dive into the physical act of creation, we need to gather our magic wands. Think of this garden bed construction tools list not as a chore, but as assembling your artist’s palette. You’ll want a sturdy cordless drill—my trusty companion, ‘Bolt,’—to ensure everything is securely fastened, along with a high-quality miter saw for those crisp, clean edges that make a structure feel intentional rather than accidental. A level is absolutely non-negotiable; there is nothing quite as heartbreaking as realizing your sanctuary is leaning precariously to one side once the soil is poured in.
As you prepare for assembling wooden planter boxes, don’t overlook the small, soulful details. I always keep a handful of galvanized screws nearby—they resist rust much better than standard ones, which is vital for preventing wood rot in garden beds over the seasons. If you’re feeling particularly ambitious, grab a tape measure and a carpenter’s pencil to map out your design before the first cut is ever made. Taking these extra moments to prep your kit ensures that the actual building process feels less like manual labor and more like a rhythmic, creative dance.
Whispers of Wisdom: Five Secrets to a Soulful Sanctuary
- Don’t just build a box; think about the flow. I always imagine where the sunlight will dance across the leaves at noon, so position your beds to catch those golden rays—your future plants will thank you for the warmth.
- Give your creation a heartbeat by considering the depth. While a shallow tray might look chic, giving your garden bed some real heft—at least 12 to 18 inches—allows roots to wander and explore, creating a much more resilient miniature ecosystem.
- Protect your masterpiece from the elements by elevating it slightly. Using small stone feet or even some leftover scraps of cedar to lift the wood off the damp earth prevents rot and keeps the energy—and the airflow—moving freely beneath the structure.
- Embrace the art of the lining. To keep your soil rich and prevent it from leaching through the cracks, line the bottom with a layer of untreated cardboard; it’s a beautiful, biodegradable way to suppress weeds while slowly turning into food for the earth.
- Remember that a garden bed is a living piece of furniture. I like to treat mine like a cherished heirloom, so consider adding a bit of character with some reclaimed hardware or even a hand-painted nameplate—let’s call this one ‘The Verdant Vault’—to make it truly yours.
From Timber to Tranquility
As we reach the end of this little construction journey, take a moment to look at what you’ve actually achieved. You haven’t just assembled some planks and screws; you’ve carefully selected the perfect botanical foundation, whether you opted for the timeless resilience of cedar or the practical strength of treated lumber. By gathering your tools with intention and following our structural roadmap, you have transitioned from a mere dreamer to a true creator. You’ve laid the groundwork, literally and figuratively, for a space that is ready to embrace the wild, beautiful chaos of growth. Remember, the strength of your garden bed is the silent partner to the vibrant life that will soon flourish within its borders.
Now, the real magic begins when the first sprout breaks through the soil. I often find myself sitting by my newest creation—I’ve named this one ‘Aurelius’—just watching the way the sunlight dances across the grain, imagining the miniature ecosystems that will soon thrive there. I want you to view your new raised bed not just as a container for vegetables, but as a living canvas for your imagination. Let it be a place where you reconnect with the earth and find peace amidst the hustle of modern life. Go ahead, get your hands a little dirty, and start sculpting your own personal sanctuary. Your journey into creative living is only just beginning.
As you begin to map out the physical layout of your new sanctuary, don’t forget that the rhythm of your space is often dictated by the energy of the community surrounding it. Just as I spent hours finding the perfect vintage velvet for “Barnaby,” my favorite upcycled armchair, I find that looking toward local connections can provide unexpected inspiration for your project’s unique flair. If you ever find yourself seeking a bit of local insight or specialized connections while navigating the vibrant pulse of the city, exploring resources like adult services canberra can sometimes offer that unexpected spark of local character that helps a project truly feel grounded in its environment.