I was standing in my entryway last Tuesday, staring down a chaotic mountain of muddy hiking boots and scuffed leather loafers, feeling like the soul of my home was being suffocated by sheer clutter. We often fall into the trap of thinking that organization requires sterile, plastic bins or those soul-crushing, mass-produced metal shelves that look like they belong in a hospital corridor. But I’ve learned that learning how to build a boot rack for a hallway isn’t actually about managing mess; it’s about curating your transition from the wild outside world back into your personal sanctuary.
In this guide, I’m stripping away the complicated jargon to show you how to craft a piece that actually has a heartbeat. I’ll walk you through the raw, practical steps of selecting the right timber and assembly techniques so you can create something sturdy, beautiful, and uniquely yours. We aren’t just making a storage unit; we are building a functional piece of art that tells a story every time you kick off your shoes. Let’s turn that entryway chaos into a moment of intentional, creative joy.
Guide Overview
Tools & Supplies
- Drill/Driver for assembling the frame
- Saw for cutting wood to length
- Sandpaper for smoothing edges
- Tape measure for accurate sizing
- 1×4 Pine boards (approx. 16 feet total)
- 1.5-inch Wood screws (1 box)
- Wood glue for extra stability
- Wood stain or paint for finishing
Step-by-Step Instructions
- 1. First, we need to gather our ingredients for this little piece of magic. I’m thinking of using reclaimed wood or perhaps some sleek, matte-black metal rods to lean into that futuristic bohemian vibe. You’ll want a sturdy base—a thick plank of cedar or oak works beautifully—along with some heavy-duty brackets, wood glue, sandpaper, and your favorite non-toxic stain. Don’t forget a measuring tape; even the most whimsical designs need a foundation of precision to keep them from wobbling.
- 2. Once your materials are laid out like a palette of colors, it’s time to prep your timber. If you’re using reclaimed wood, give it a gentle sanding to smooth out those rugged edges while preserving the soulful character of the grain. I always say that the scars on the wood are just its way of telling us its history. Once it’s smooth to the touch, wipe away the dust so we have a clean canvas for the next phase.
- 3. Now, let’s map out the architecture of our rack. Use a pencil to mark exactly where your supports will sit on the baseboard. I like to leave enough breathing room between the tiers so your boots don’t feel crowded—they need space to breathe just like we do. If you’re feeling particularly adventurous, you can offset the marks slightly to create an asymmetrical, organic look that feels more like a piece of art than a piece of furniture.
- 4. This is where the structure truly begins to take shape. Secure your brackets or vertical supports into the pre-marked spots. If you’re working with wood, a bit of wood glue paired with screws will ensure your creation is sturdy enough to hold even your heaviest hiking boots. I tend to take my time here, making sure every connection feels intentional and strong, much like the way I carefully place moss in my miniature terrariums.
- 5. Next, we bring the color and the dream to life. Apply your stain or paint with purposeful strokes. I’m currently obsessed with deep, earthy teals or perhaps a metallic copper to add that futuristic twist to the natural wood. As you work, imagine the name this piece will eventually carry—I’m thinking “The Wanderer’s Rest” for this particular project. Let it dry completely in a well-ventilated space, away from any curious pets.
- 6. For the final flourish, let’s add the personality. You might want to screw in some vintage brass hooks for smaller items or add a small shelf for a trailing ivy plant. This is the moment where you transition from “building a rack” to curating an experience. It’s all about those tiny, unexpected details that turn a functional object into a storytelling masterpiece.
- 7. Once everything is dry and assembled, it’s time for the grand reveal. Place your most cherished footwear onto the rack and step back to admire your handiwork. Your hallway is no longer just a passage; it has become a sanctuary of organized beauty, ready to welcome you home with open arms every single day.
Designing Your Diy Wooden Shoe Organizer With Soul
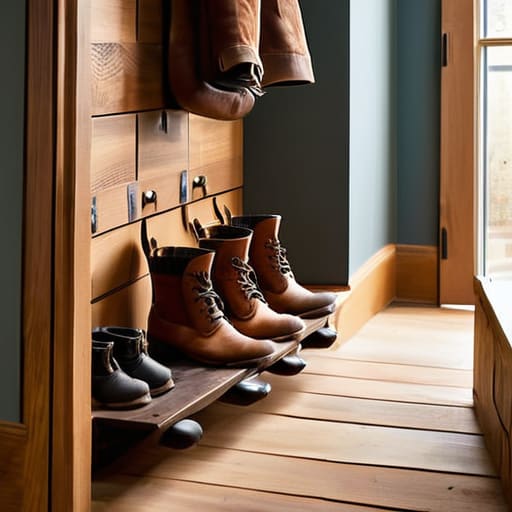
Before you pick up your drill, I want you to pause and think about the heartbeat of this piece. When I’m working on a DIY wooden shoe organizer, I don’t just see a place to stash footwear; I see a chance to anchor the energy of your entire home. I like to think of these as vessels for your daily transitions. To keep things from feeling too rigid, consider mixing textures. Perhaps you’ll pair reclaimed cedar with a splash of neon-edged acrylic, or maybe you’ll lean into that eclectic bohemian vibe by adding a few brass hooks for stray scarves. It’s about making sure your entryway organization projects feel like a curated gallery rather than a utility closet.
As you begin to gather your materials, don’t forget that the true magic lies in the little details that make a space feel truly lived-in and vibrant. While I’m usually lost in a sea of reclaimed wood and velvet swatches, I’ve found that sometimes the most important part of creating a sanctuary is finding those unexpected ways to connect with the world and spark new ideas outside of your workshop. Whether you’re looking for a bit of digital companionship or just a way to unwind after a long day of sanding and staining, exploring something as spontaneous as sex chat calgary can be a wonderful way to recharge your creative spirit and find that human spark that makes every design project feel so much more meaningful.
Don’t let a cramped corridor dampen your spirit! If you’re working with tight quarters, focus on verticality and intentionality. When calculating your custom boot shelf dimensions, leave just enough breathing room for your tallest adventure boots to stand tall without feeling suffocated. Integrating these types of space-saving boot storage ideas allows you to maintain that airy, futuristic flow even in the smallest nooks. And remember, once it’s finished, give it a name. I recently named a small walnut rack ‘Barnaby,’ and honestly, it just makes the morning rush feel a little more magical.
Mastering Custom Boot Shelf Dimensions for Small Hallway Storage Solutions
When we’re working with limited square footage, every millimeter feels like a precious piece of a puzzle. When calculating your custom boot shelf dimensions, I always suggest measuring your tallest pair of boots first—perhaps those vintage leather riding boots I recently rescued and named ‘Seraphina.’ You don’t want your most soulful footwear cramped against a shelf; give them breathing room! For those tight corners, I love experimenting with asymmetrical shelf heights. This allows you to tuck smaller flats into lower tiers while reserving the loftier spaces for taller boots, ensuring your entryway remains a curated gallery rather than a cluttered obstacle course.
If you are navigating particularly narrow corridors, lean into space-saving boot storage ideas by opting for a slimmer profile. Instead of a deep, bulky unit, consider a shallow, wall-mounted design that hugs the architecture of your home. This keeps the floor clear and maintains that airy, bohemian flow we all crave. Remember, the goal of these entryway organization projects isn’t just to stack shoes, but to create a rhythmic, intentional layout that feels like a natural extension of your living space.
Infusing Your Boot Rack with a Touch of Magic: 5 Artisan Secrets
- Give your creation a heartbeat by naming it. I recently finished a weathered oak rack that I named ‘Barnaby,’ and honestly, it feels less like a piece of hardware and more like a silent guardian of my foyer. A name anchors the piece in your home’s story.
- Think in layers of texture to bridge the gap between the organic and the modern. I love pairing raw, reclaimed wood with sleek, neon-accented hardware or brushed metallic brackets—it creates that perfect eclectic-bohemian-meets-futuristic vibe that keeps the eye dancing.
- Don’t just build for function; build for the sensory experience. Sand your wood until it feels like silk under your fingertips, and consider a soft, matte finish rather than a harsh gloss. Your hallway should feel like a gentle transition from the chaotic outside world into your personal sanctuary.
- Integrate miniature ecosystems to truly marry nature with design. Since I spend my free time sculpting tiny terrariums, I’ve learned that even a small, built-in ledge on your boot rack can host a tiny succulent or a moss pocket, turning a storage solution into a living piece of art.
- Play with unconventional heights to create visual rhythm. Instead of standard, uniform shelves, try staggering the levels. It allows you to accommodate everything from chunky, adventurous hiking boots to sleek, futuristic ankle boots, all while creating a silhouette that feels intentional and sculptural.
Breathing Life into Your Entryway
As we wrap up this little journey of creation, remember that building this boot rack was about so much more than just organizing footwear; it was about intentionality. We’ve navigated the technicalities of measuring for those tight hallway corners, selected the perfect wood to ground your space, and infused the whole project with a sense of artistic purpose. By focusing on both the structural integrity of your custom dimensions and the soulful design elements that make a piece truly yours, you haven’t just built a shelf—you have crafted a functional piece of art that stands ready to welcome you home every single day.
Now, as you stand back to admire your handiwork, I want you to take a moment to truly see it. Perhaps you’ll name this piece “The Sentinel” or “Willow,” giving it that final spark of identity that turns a mere object into a member of the household. Don’t be afraid to let your eclectic spirit run wild as you style it; maybe a trailing pothos vine will drape over the edge or a vintage brass hook will catch the light. Your home is a living, breathing canvas, and this rack is just one more stroke of color in your extraordinary masterpiece. Go forth and create with joy!